REDCAT always advise the removal of ANY wheel safety product before wheel nut torque checking, the insufficient engagement between the socket and nut caused by the proximity of ANY product whilst torquing can result in sudden detachment and possible injury due to the decreased leverage resistance at the socket nut interface. This leverage is exacerbated with the introduction of extension bars primarily on dual rear wheels.It is critical to remove ANY wheel safety products whilst performing torque checks.
INSTALLATION GUIDE FOR REDCAT® WHEEL SAFETY SYSTEMS
Installation Steps for REDCAT® Standard Wheel Nut Indicators
(including Safewheel® extended and single cap type indicators)
For improved efficiency, documentation, and consistency, it is recommended to install wheel indicators during regularly scheduled maintenance visits to the workshop.
- Inspect nuts, studs, rims, and threads for any damage in accordance with the manufacturer's recommendations.
- Ensure that the mating surfaces of the hub and rim are clean and free from dirt, rust, or paint.
- Torque the nuts to the manufacturer's specifications and avoid lubrication unless advised otherwise by the manufacturer.
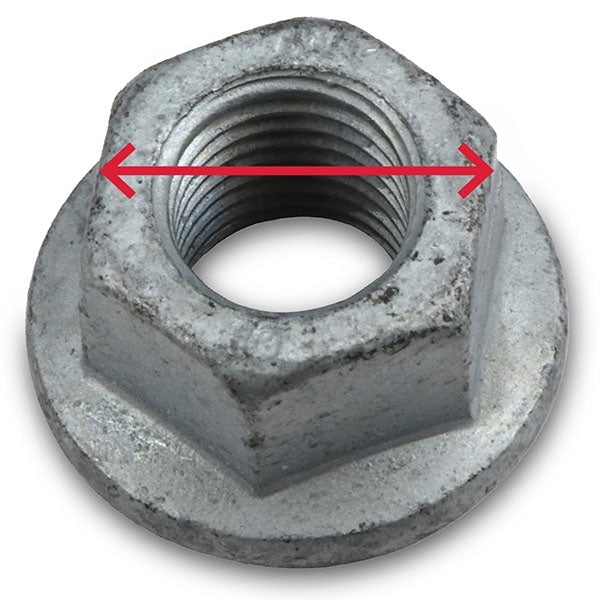
- Determine the size of the loose wheel indicator required by measuring the across flat (A/F) size of the nut. A well-fitting socket, spanner, or Vernier calliper can identify the wheel nut size.
5. NOTE: To account for stud stretch, hub/wheel settling, or human error, the industry-accepted 50 km retorque may be incorporated into the fleet maintenance procedure. Maintenance procedures may require the completion of an in-cab warning hanger, the positioning of a warning sticker, or the fitting of red indicators to identify refitted wheels.
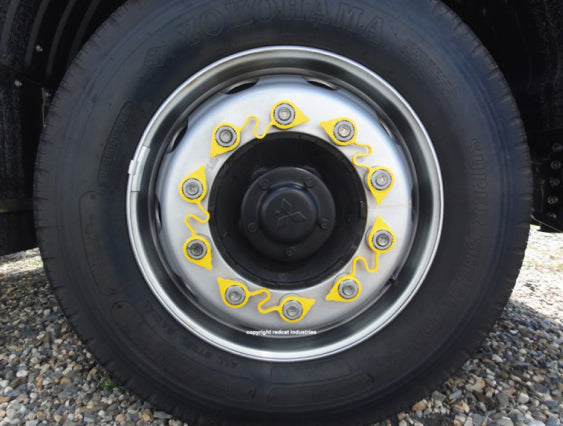
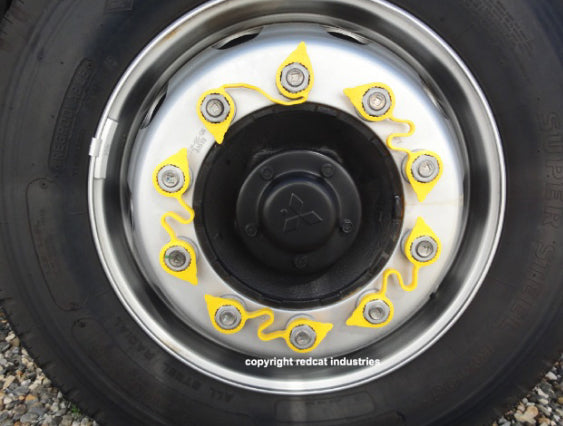
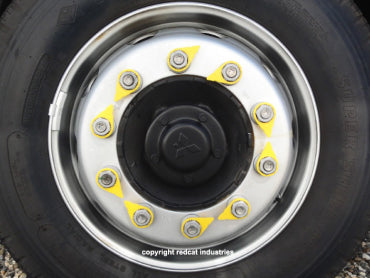
6. Determine the pattern of indicators to be fitted, such as point-to-point, direction of rotation, outward pointing, or inward pointing, which may be dictated by the PCD, proximity of the outer rim, or reduction hub. For ten-stud 335 and 285mm PCD rims, REDCAT recommends a point-to-point pattern. Ensure that the REDCAT indicator has enough space to move and is not aligned against the rim or hub.
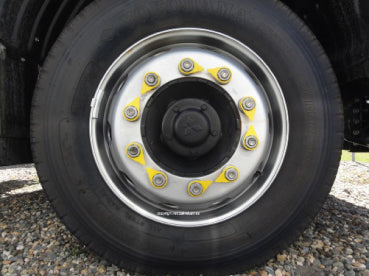
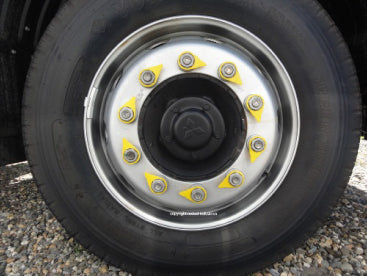
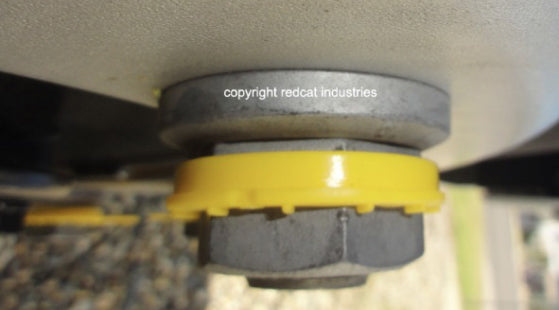
7. Simply push the REDCAT 1 loose wheel indicators over the nut with the raised collar facing the rim. It is preferable to maintain a 1mm air gap between the indicator flange face and the rim.
8. Ensure that staff understand the fundamentals of loose wheel indicators and update documentation accordingly.
9. Perform a 50-60 km retorque if applicable.
REMOVAL - To remove the indicator, grip it and pull it off by hand.
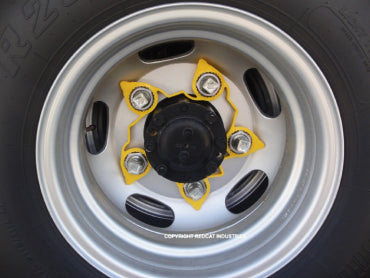
Installation Steps for REDCAT® 2 Link type Indicator/Locker
1. Repeat procedures 1 to 5 as per REDCAT 1 standard indicators
2. The pre-angled multi PCD indicator retainer is simply pushed over the nut in a point to point pattern. Ensure the correct size for secure fitment with the pointer face towards you, preferably with an air gap between the wheel and indicator of at least 1mm.
REMOVAL – Simply grip the indicator by the ring and remove by hand. Otherwise prise off with a flat bladed screwdriver. Do not lever off from the link centre.
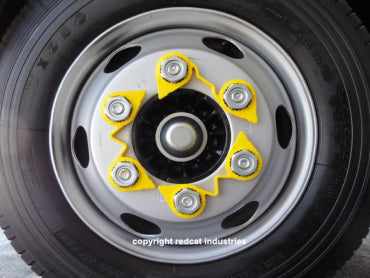
Installation Steps for REDCAT® 3 Ring type Indicator/Retainer
1. Repeat procedures 1 to 5 as per REDCAT 1 standard indicators
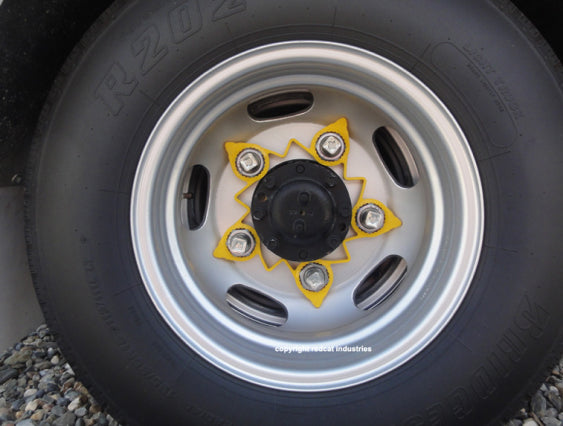
2. Installing the single-piece pre-angled indicator/retainer is easy; simply push it over the nut in an outward pointing pattern. Position the indicator with an air gap of at least 1mm between the wheel and the indicator.
Safety Warning: It is important to remove any wheel safety product before conducting wheel nut torque checks. Failure to do so may result in sudden detachment and potential injury due to reduced leverage resistance at the socket nut interface caused by insufficient engagement between the socket and nut. This issue is exacerbated by the use of extension bars, especially on dual rear wheels. To ensure safety, it is crucial to remove any wheel safety products when performing torque checks.
VISUAL INSPECTION GUIDE FOR REDCAT® WHEEL SAFETY SYSTEMS
Early identification of wheel defects can save considerable fleet costs, minimise downtime, increase fleet safety,
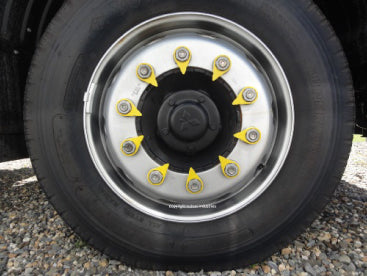
REDCAT® loose wheel nut indicators supplement the manufacturer's recommended torque checks by providing a simple visual indication of loosening wheels during a quick daily walk around of the vehicle.
If the indicator is misaligned from the normal pattern, the wheel has loosened, and the wheel nuts have backed off. Daily pre-start inspections include checking the indicators for misalignment and damage (missing indicators may mean broken studs or stripped studs/nuts) checking for fret marks and or rust between the nut and rim, and browning of the pointer primarily at the nut interface, any discrepancies require investigation and replacement of the indicator.
Standard operator awareness of vibration or excessive wheel noise is still necessary and requires immediate observation of wheel fixtures for the discrepancy. Damaged indicators should be replaced.
Remember, without timely identification and intervention loose wheel assemblies will ultimately fail regardless of nut restraint.
Visually Identifying Dragging Brakes
Manually identifying sticking brake hubs can be labour-intensive and not always conclusive. REDCAT® wheel nut indicators offer a simple alternative to this
Browning off on the perimeter of the REDCAT® wheel nut indicator can indicate increased hub temperatures due to sticking brakes, brake overuse (driver error) or brake system failures and may require investigation. In some cases, high brake temperatures may be normal.
Safety Warning: It is important to remove any wheel safety product before conducting wheel nut torque checks. Failure to do so may result in sudden detachment and potential injury due to reduced leverage resistance at the socket nut interface caused by insufficient engagement between the socket and nut. This issue is exacerbated by the use of extension bars, especially on dual rear wheels. To ensure safety, it is crucial to remove any wheel safety products when performing torque checks.
Testimonials
Agricultural Automotive Company, Australia

"I would highly recommend Redcat products as they are made from high-quality materials. Their customer service team member Harrison has exceptional customer service skills and answers emails in a timely manner. Completes your order within an hour and sends the order out the same day & we receive our order the next day".
Australian Automotive Company
"We are highly satisfied with Redcat's quality of wheel nut indicators, our clients request that we only supply the Redcat brand".
Heavy Vehicle Trailer Manufacturer, NSW Australia
"Great products, Redcat has great customer service & great dispatch for quick delivery".
Australian Manufacturer of Fire & Safety Products
"Customer Support, Speed of dispatch & knowledge of their products are all very on Game. Redcat is a great supplier to work with. Always helpful in regard to packing sizes and any other questions I have. I will and have recommended them".
- Choosing a selection results in a full page refresh.


